
Using the Web Monetization API for fun and profit

I recently spoke at JSConf Mexico, where spent a lot of time with the Interledger Foundation folks in the hallway track and at the after party events, namely with Ioana (Eningeering Manager) and Marian (DevRel) to talk about Web Monetization.

Web Monetization gives publishers more revenue options and audiences more ways to sustain the content they love. Support can take many forms: from a one-time contribution to a continuous, pay-as-you-browse model. It all flows seamlessly while people engage with the content they love. Publishers earn the moment someone engages, while audiences contribute in real time, using a balance they control.

I encourage you all to give it a try! Install the extension that polyfills the proposed Web standard, get a wallet (I went with GateHub, which works in US Dollars and Euros), and then connect it to the extension.

You need to have funds in EUR (€) or USD ($). If you have crypto, it won't work, which I've found out by trial and error, as I was part of Coil, the Web Monetization predecessor, which paid out in XRP.

Just to clarify, while you need a walletβ€”that typically is used for cryptoβ€”the actual transactions are all in real fiat money, Euro in my case.

As an extension user

Connect your wallet, and browse to a page that supports Web Monetization. You will notice whether a page is monetized when the extension has a green checkmark. My blog happens to be monetized.
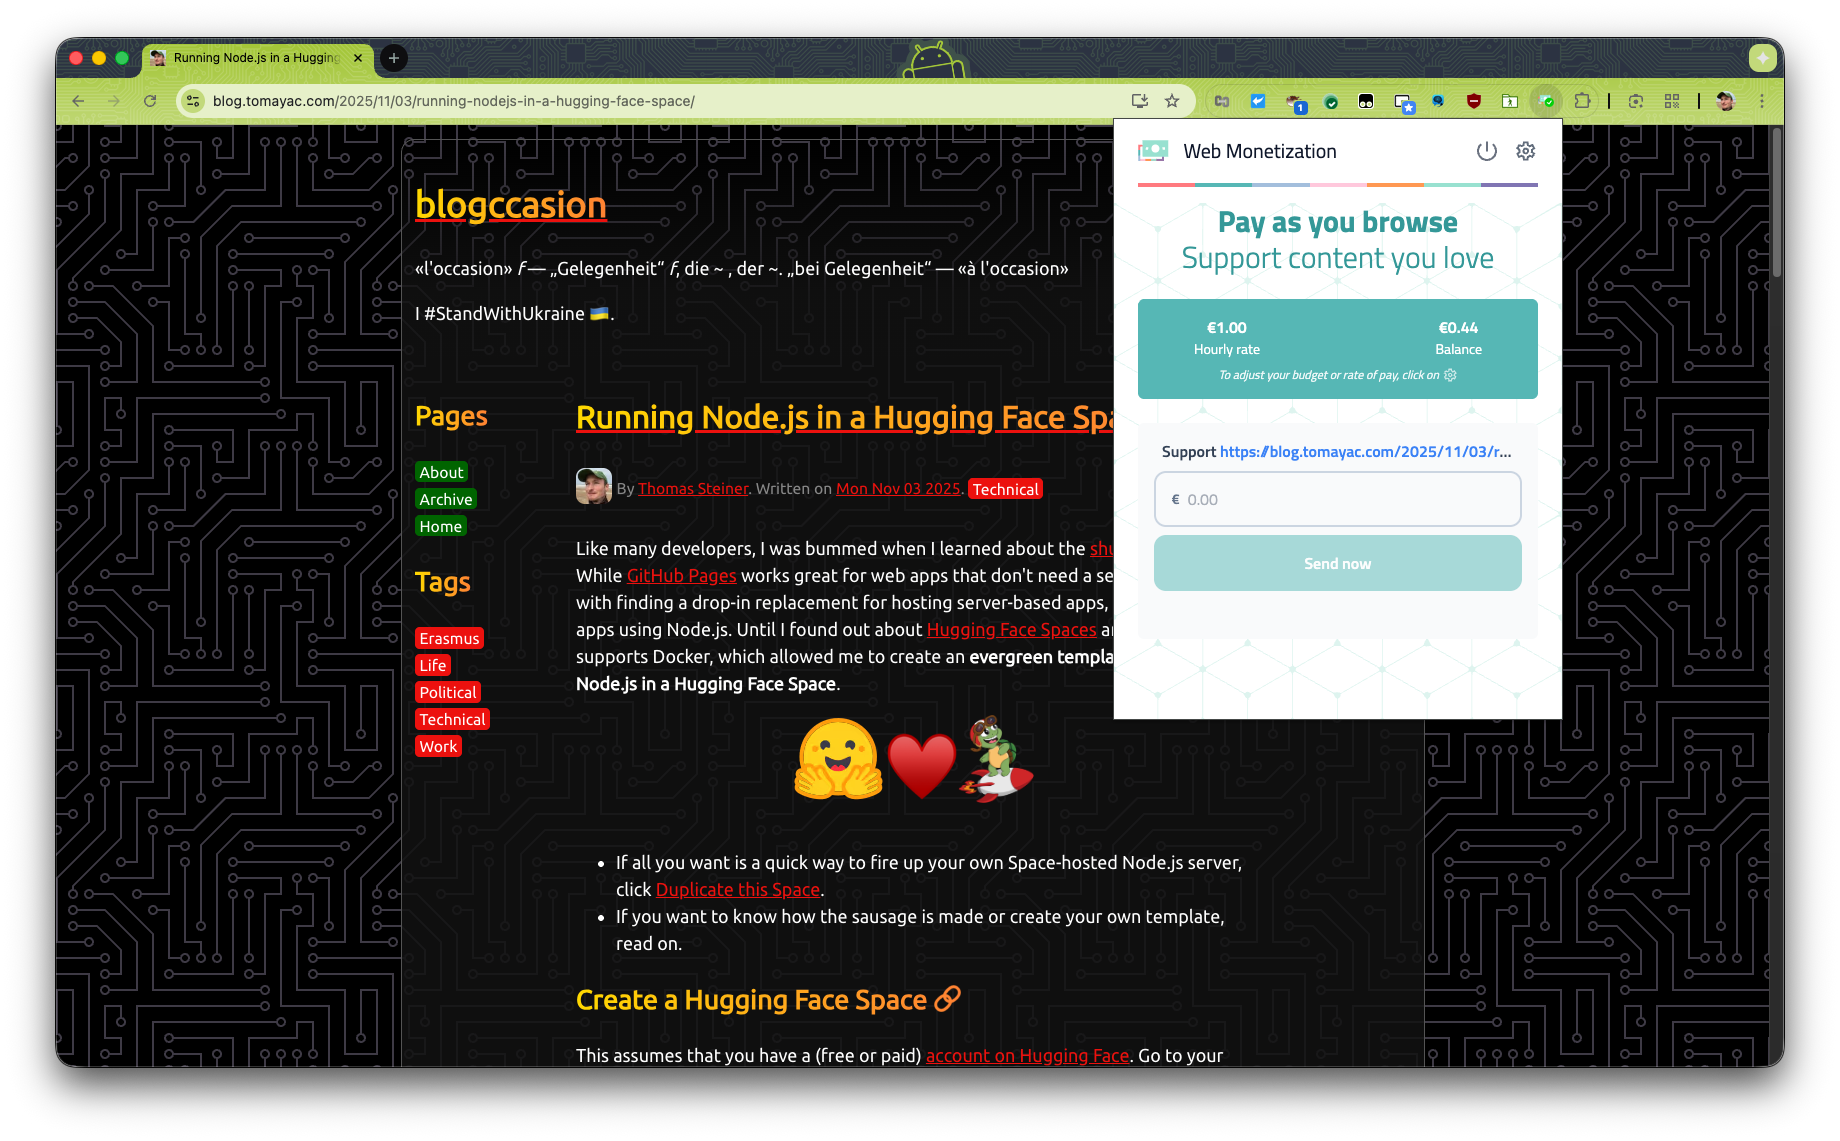
The Web Monetization extensions's popup window.

You can adjust how much you want to pay the site per hour and also send one-time payments. The money is "streamed" every minute, which you can observe in DevTools.
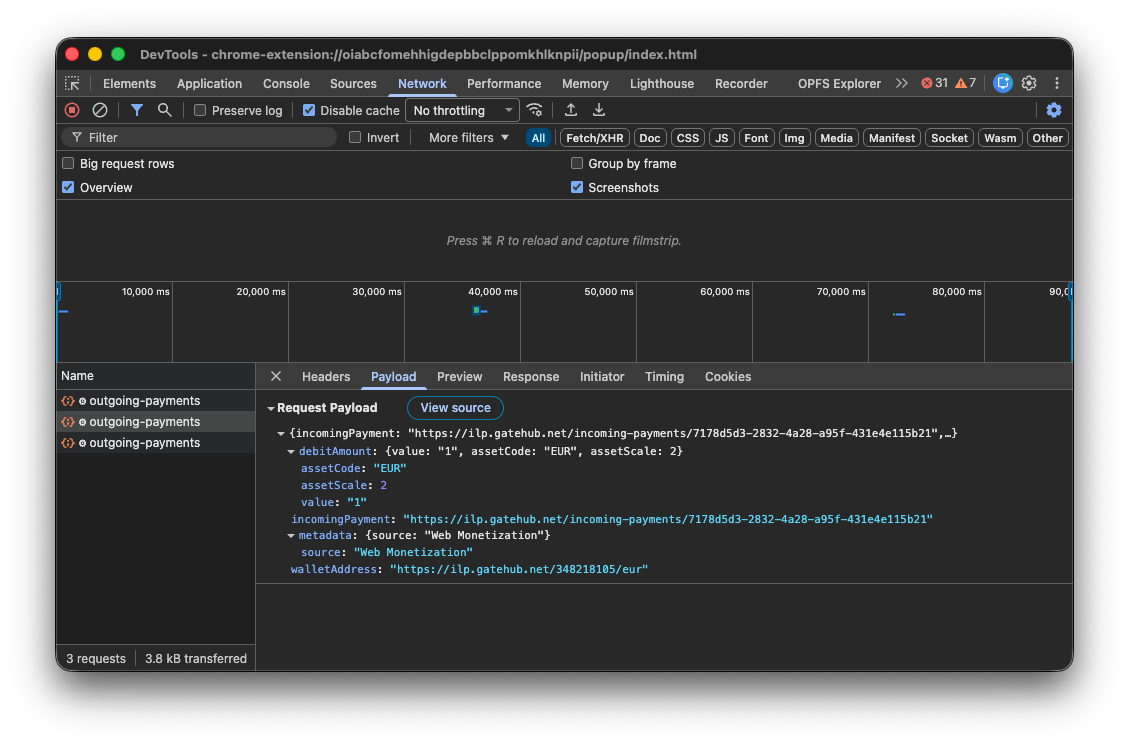
Chrome DevTools Network tab showing a POST request for a payment.

We actually have code in Chromium to make native Web Monetization happen, implemented by Igalia and funded by the Interledger Foundation. I hope they can share the experiment results soon.

As a publisher

On your page, add a payment link. You get the personalized payment pointer from your wallet. The following snippet shows mine.

<link rel="monetization" href="https://ilp.gatehub.net/348218105/eur" />

Then you're ready to receive payments. Here's me browsing my blog and seeing payments go out from and come in to my GateHub wallet. This is of course effectively a zero sum game, me paying myself. The 0.01 cent are the streamed payments that go out and then come in again. I tested a one-time payment as well. The 0.50 cents (not shown) was a successful one-time payment.
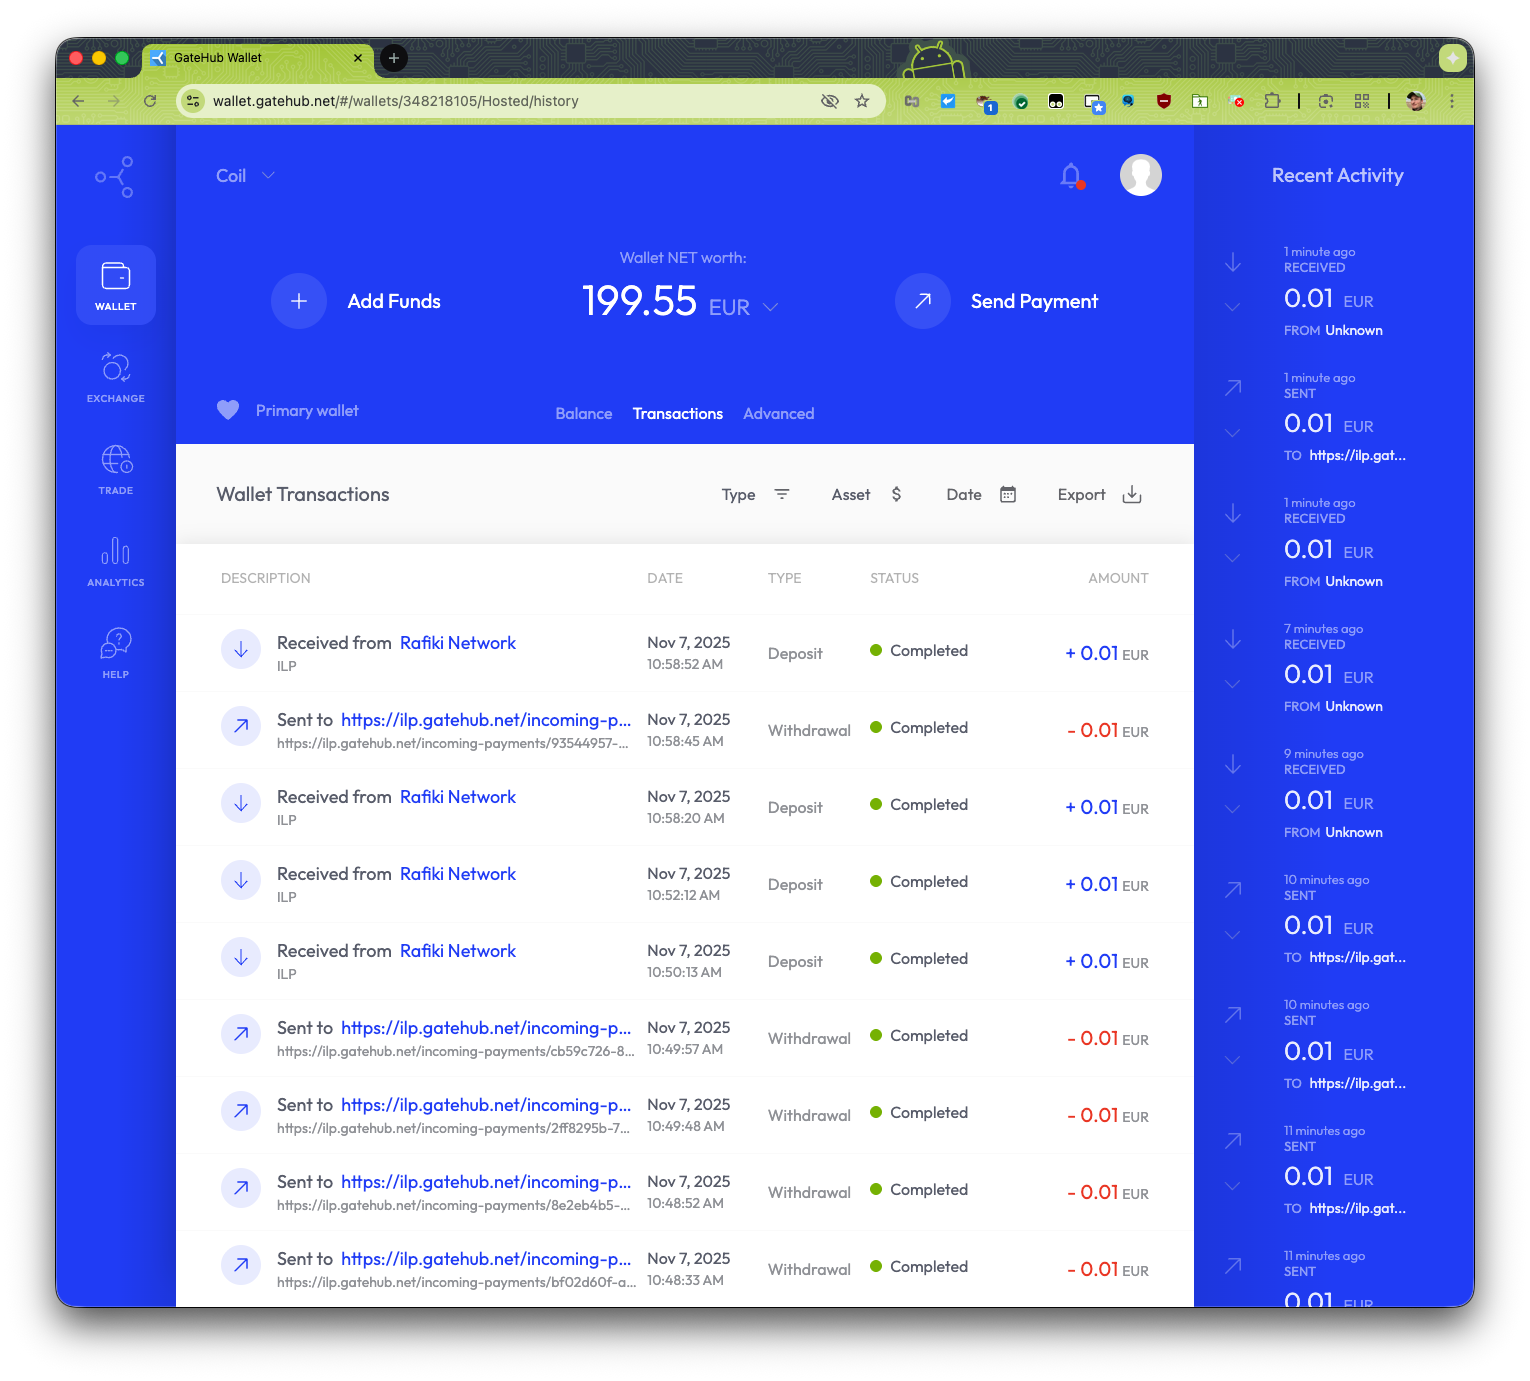
The GateHub wallet showing incoming and outgoing transactions.

There's also a JavaScript API, so you can adjust the content of your page when your page notices that the user is paying.

window.addEventListener('monetization', (event) => {
  const { value, currency } = event.amountSent;
  console.log(`Browser sent ${currency} ${value}.`);
  const linkElem = event.target;
  console.log('for link element:', linkElem, linkElem.href);
});

For testing purposes, you can observe these monetization events in Chrome DevTools by pasting in the snippet above in the Console.
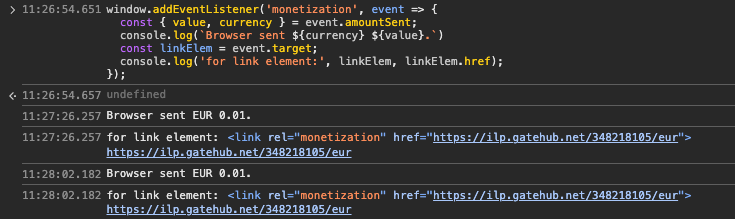
Chrome DevTools Console showing a  event.

This way you could, for example, remove ads, or unlock an article when you notice a one-time payment. On my blog, I just show a "thank you" message for now.
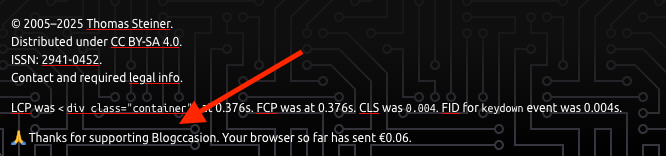
Thank you message in the footer of my blog showing how much the user has paid.

I'm really bulli$h on this proposed standard. Hopefully someone else will try it and let me know how it goes. I truly and honestly believe that this could be the future for making the Web of tomorrow financially sustainable for publishers, big and small.

Thomas Steiner
This post appeared first on https://blog.tomayac.com/2025/11/07/using-the-web-monetization-api-for-fun-and-profit/.


Running Node.js in a Hugging Face Space

Like many developers, I was bummed when I learned about the shutdown of Glitch. While GitHub Pages works great for web apps that don't need a server, I struggled with finding a drop-in replacement for hosting server-based apps, and specifically apps using Node.js. Until I found out about Hugging Face Spaces and that it supports Docker, which allowed me to create an evergreen template for running Node.js in a Hugging Face Space.

Hugging Face β™₯️ Node.js
  • If all you want is a quick way to fire up your own Space-hosted Node.js server, click Duplicate this Space.
  • If you want to know how the sausage is made or create your own template, read on.

Create a Hugging Face Space

This assumes that you have a (free or paid) account on Hugging Face. Go to your profile and create a new Hugging Face Space using Docker as the Space SDK. Go for the Blank Docker template. Leave all the other settings unchanged, so you end up on the free tier. Choose if your Space should be private or public.

An evergreen template

The objective is to make this template evergreen, so no concrete version numbers are hardwired. Instead, the idea is to hardwire the version numbers when you duplicate the template to create a permanent Space.

Create a package.json file

Next, create the package.json file that your template should use. Note that this uses "latest" as the Express.js version, as the template is meant to stay evergreen.

{
  "name": "nodejs-template",
  "version": "0.0.1",
  "description": "A template for running Node.js in a Hugging Face Space.",
  "keywords": ["Node", "Node.js", "Hugging Face Space"],
  "repository": {
    "type": "git",
    "url": "git@hf.co:spaces/tomayac/nodejs-template"
  },
  "license": "Apache-2.0",
  "author": "Thomas Steiner (tomac@google.com)",
  "type": "module",
  "main": "index.js",
  "scripts": {
    "start": "node index.js"
  },
  "dependencies": {
    "express": "latest"
  }
}

Create a Dockerfile

As the next step, create a Dockerfile for your template. Again I'm using an evergreen approach here with a Node.js Docker tag of lts-alpine, which means I always get the LTS release of Node.js running on the lightweight Alpine Linux.

# Node base image
FROM node:lts-alpine

# Switch to the "node" user
USER node

# Set home to the user's home directory
ENV HOME=/home/node PATH=/home/node/.local/bin:$PATH

# Set the working directory to the user's home directory
WORKDIR $HOME/app

# Moving file to user's home directory
ADD . $HOME/app

# Copy the current directory contents into the container at $HOME/app setting the owner to the user
COPY --chown=node . $HOME/app

# Loading Dependencies
RUN npm install

# Expose application's default port
EXPOSE 7860

# Entry Point
ENTRYPOINT ["nodejs", "./index.js"]

Create an index.js file

Up next, create your default index.js file that your template should use when the Node.js server starts. I went with the battle-proven Express.js server framework. Note that the port needs to be 7860.

Now for the smart part: The code dynamically reads out the used Express.js and Node.js version, so when you duplicate the template, you can hard-wire these versions. After duplicating the template, in your code, update the highlighted parts:

  • In your Dockerfile, replace node:lts-alpine with, for example, node:24-alpine.
  • In your package.json file, replace "express": "latest" with, for example, "express": "^5.1.0".
import express from 'express';

const app = express();
const port = 7860;

app.get('/', async (req, res) => {
  res.send(
    `Running Express.js ${
      (
        await import('express/package.json', {
          with: { type: 'json' },
        })
      ).default.version
    } on Node.js ${process.version.split('.')[0].replace('v', '')}`
  );
});

app.listen(port, () => {
  console.log(`Example app listening on port ${port}`);
});

Create a REAMDE.md file

To set some metadata for your template, create a README.md file with YAML front matter at the beginning. Hugging Face makes this easy via its Web interface for the standard parameters, but you can modify many more parameters as per the documentation.

---
license: apache-2.0
title: Node.js template
sdk: docker
emoji: 🐒
colorFrom: green
colorTo: green
short_description: A template for running Node.js in a Hugging Face Space
---

What's missing?

While you can edit files individually on Hugging Face's Space Files view with syntax highlighting and editing support, it's not a full-blown IDE, but you can clone your Space with git and work on it locally (or with an online IDE like VS Code).

git clone git@hf.co:spaces/tomayac/nodejs-template

See it live and bonus

And this is it really. Now you have a running Node.js app that you can duplicate whenever you need to spin up a Node.js server. The best is that this Space runs in its own main browser context, https://tomayac-nodejs-template.hf.space/ in the concrete case, not somewhere in an iframe, which means you can set headers like COOP or COEP to get access to powerful features like SharedArrayBuffer and friends. In fact, Hugging Face even allows you to set these custom_headers by default in the YAML front matter config at the beginning of the README.md. Note, though, that adding these headers means your app will only run in standalone mode, but no longer in the default Space iframed view.

custom_headers:
  cross-origin-embedder-policy: require-corp
  cross-origin-opener-policy: same-origin
  cross-origin-resource-policy: cross-origin

Happy hacking!

Thomas Steiner
This post appeared first on https://blog.tomayac.com/2025/11/03/running-nodejs-in-a-hugging-face-space/.